SPFX Deployment in SPO
Package the HelloWorld web part
In the console window, go to the web part project directory created in Build your first SharePoint client-side web part.
cd helloworld-webpartIf gulp serve is still running, stop it from running by selecting CTRL+C.
Unlike in the Workbench, to use client-side web parts on modern SharePoint server-side pages, you need to deploy and register the web part with SharePoint. First you need to package the web part.
Open the HelloWorldWebPart web part solution in Visual Studio Code, or your preferred IDE.
Open package-solution.json from the config folder.
The package-solution.json file defines the package metadata as shown in the following code:
JSON{"$schema": "https://developer.microsoft.com/json-schemas/spfx-build/package-solution.schema.json", "solution": { "name": "mysolution-client-side-solution", "id": "ee1a495d-c7bb-499b-bd71-728aaeb79cd2", "version": "1.0.0.0", "includeClientSideAssets": true, "skipFeatureDeployment": true, "isDomainIsolated": false, "developer": { "name": "", "websiteUrl": "", "privacyUrl": "", "termsOfUseUrl": "", "mpnId": "Undefined-1.14.0" }, "metadata": { "shortDescription": { "default": "mysolution description" }, "longDescription": { "default": "mysolution description" }, "screenshotPaths": [], "videoUrl": "", "categories": [] }, "features": [ { "title": "mysolution Feature", "description": "The feature that activates elements of the mysolution solution.", "id": "d72e47b2-d5a2-479f-9f9a-85e1e7472dee", "version": "1.0.0.0" } ] }, "paths": { "zippedPackage": "solution/mysolution.sppkg" } }In the console window, enter the following command to bundle your client-side solution:
gulp bundleIn the console window, enter the following command to package your client-side solution that contains the web part:
gulp package-solutionThe command creates the following package: ./sharepoint/solution/helloworld-webpart.sppkg.
Package contents
The package uses SharePoint Feature to package your web part. By default, the gulp task creates a feature for your web part.
You can view the raw package contents in the ./sharepoint/solution/debug folder.
The contents are then packaged into an .sppkg file. The package format is similar to a SharePoint add-ins package and uses Microsoft Open Packaging Conventions to package your solution.
The JavaScript files, CSS, and other assets are packaged in the package when the --ship option is used. In this tutorial, however, we'll first test deployment and capabilities by hosting JavaScript files from localhost. Automated packaging and hosting option is explained in the next tutorial.
Note
Starting from the SharePoint Framework v1.4, static assets are by default packaged inside of the sppkg package. When a package is deployed in the app catalog, the assets are automatically hosted either from Office 365 CDN (if enabled) or from an app catalog URL. You can control this behavior with the includeClientSideAssets setting in the package-solution.json file.
Deploy the HelloWorld package to app catalog
Next, you need to deploy the package that was generated to the app catalog.
Note
If you do not have an app catalog, a SharePoint Online Admin can create one by following the instructions in this guide: Use the App Catalog to make custom business apps available for your SharePoint Online environment.
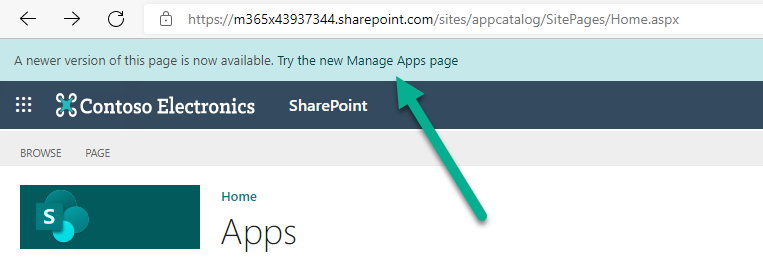
Go to your site's app catalog.
If you see classic experience in the app catalog, choose to move the new experience by clicking Try the new Manage Apps page in the header
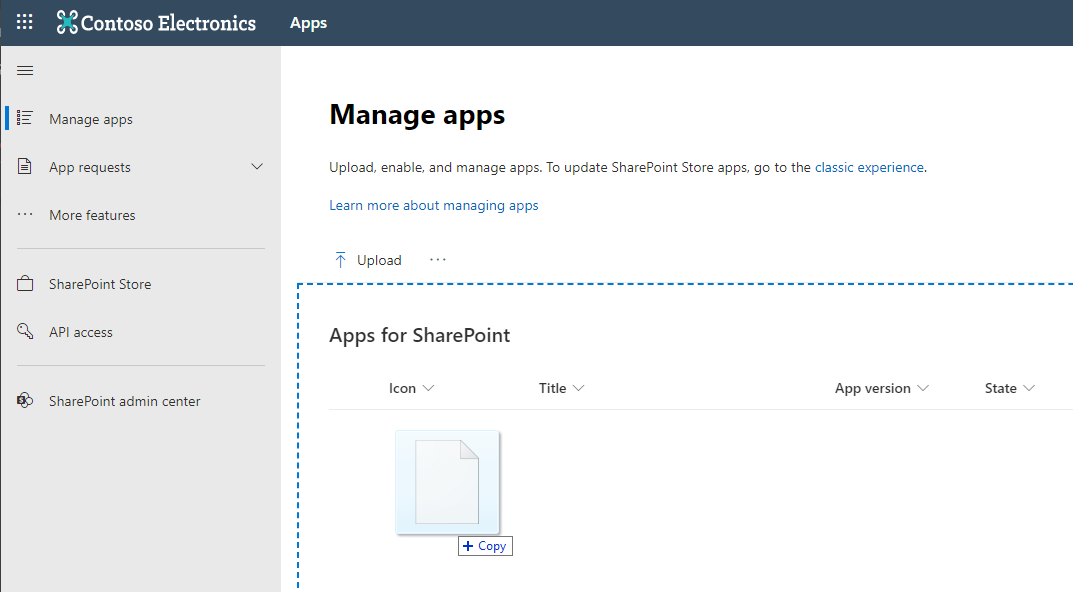
Upload or drag and drop the helloworld-webpart.sppkg to the app catalog.
This deploys the client-side solution package. Because this is a full trust client-side solution, SharePoint displays a dialog and asks you to trust the client-side solution to deploy.
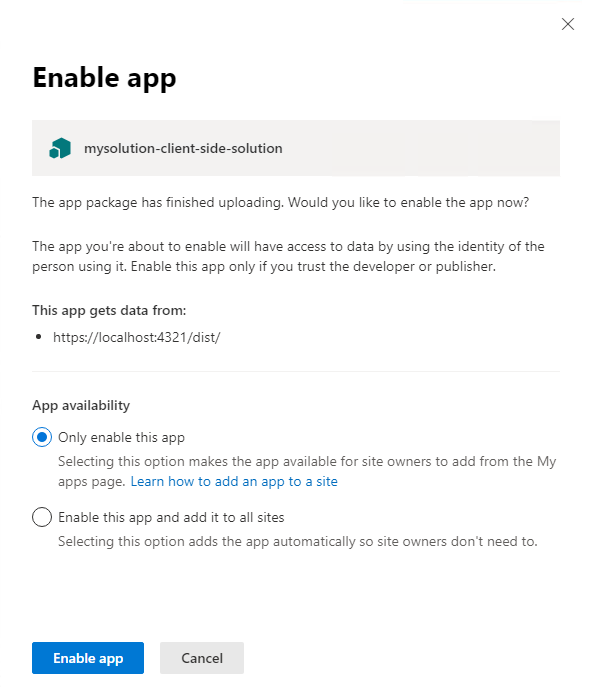
Select Enable app.
Notice that you can see if there's any exceptions or issues in the package by looking the App Package Error Message column in the app catalog.
Install the client-side solution on your site
Go to your developer site collection or site collection that you want to use for testing
Select the gears icon on the top nav bar on the right, and then select Add an app to go to your Apps page.
In the Search box, enter helloworld, and select ENTER to filter your apps.
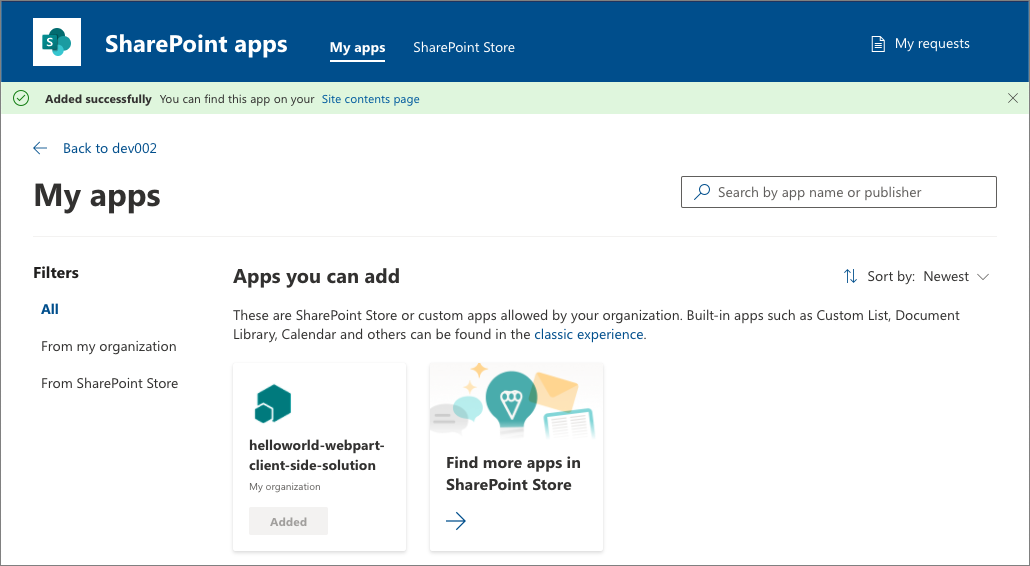
Select the helloworld-webpart-client-side-solution app to install the app on the site.
The client-side solution and the web part are installed on your developer site.
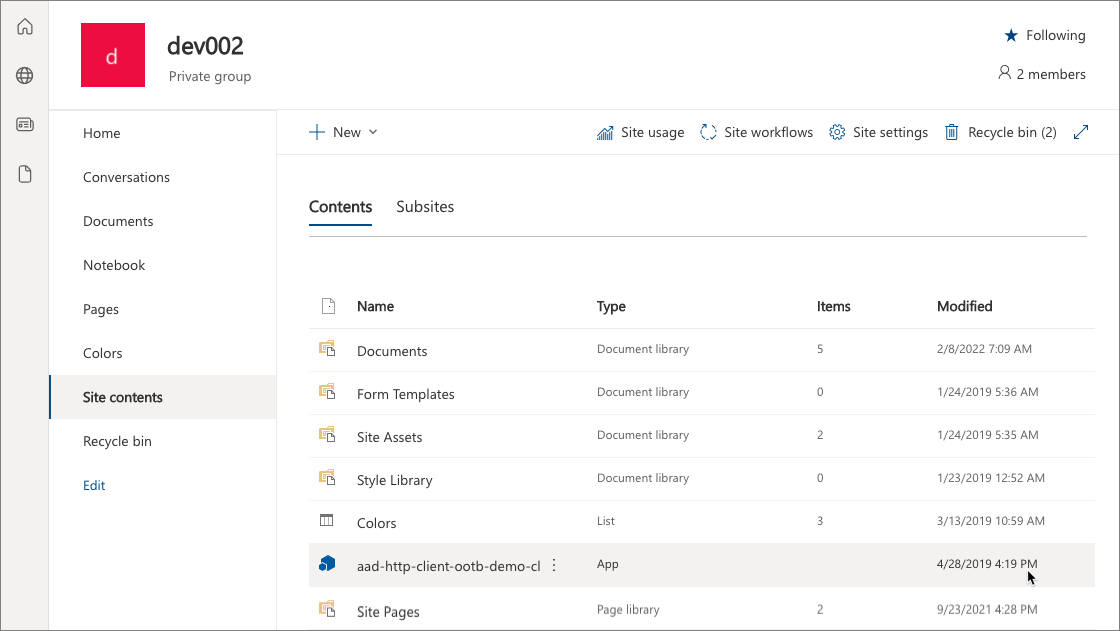
The Site Contents page shows you the installation status of your client-side solution. Make sure the installation is complete before going to the next step.
Preview the web part on a SharePoint page
Now that you've deployed and installed the client-side solution, add the web part to a SharePoint page. Remember that resources such as JavaScript and CSS are available from the local computer, so rendering of the web parts will fail unless your localhost is running.
Open the {{your-webpart-guid}}.manifest.json from the dist folder.
Notice that the
internalModuleBaseUrlsproperty in theloaderConfigentry still refers to your local computer:JSON"internalModuleBaseUrls": [ "https://localhost:4321/dist/" ],Before adding the web part to a SharePoint server-side page, run the local server.
In the console window that has the helloworld-webpart project directory, run the gulp task to start serving from localhost:
JSONgulp serve --nobrowserNote
--nobrowserwill not automatically launch the SharePoint workbench as that's not needed in this case as we will host the web part in SharePoint page.
Add the HelloWorld web part to modern page
In your browser, go to your site where the solution was installed.
Select the gears icon in the top nav bar on the right, and then select Add a page.
Edit the page.
Open the web part picker and select your HelloWorld web part.
Note
Screenshots are from a site which is using modern experience.
The web part assets are loaded from the local environment. To load the scripts hosted on your local computer, you need to enable the browser to load unsafe scripts. Depending on the browser, you're using, make sure you enable loading unsafe scripts for this session.
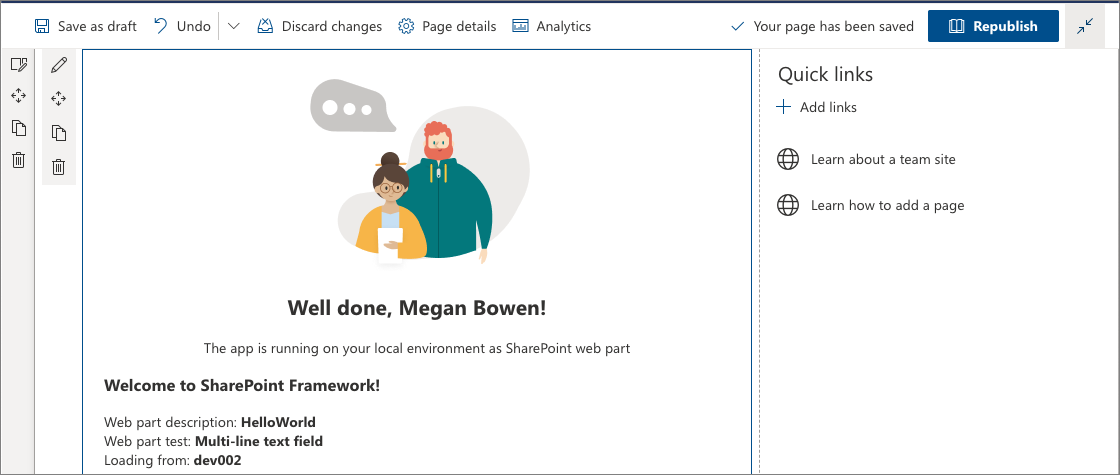
You should see the HelloWorld web part you built in the previous article that retrieves lists from the current site.
Edit web part properties
Select the Configure element icon (pen) in the web part to open the property pane for the web part.

This is the same property pane you built and previewed in the Workbench.
Edit the Description property, and enter Client-side web parts are awesome!
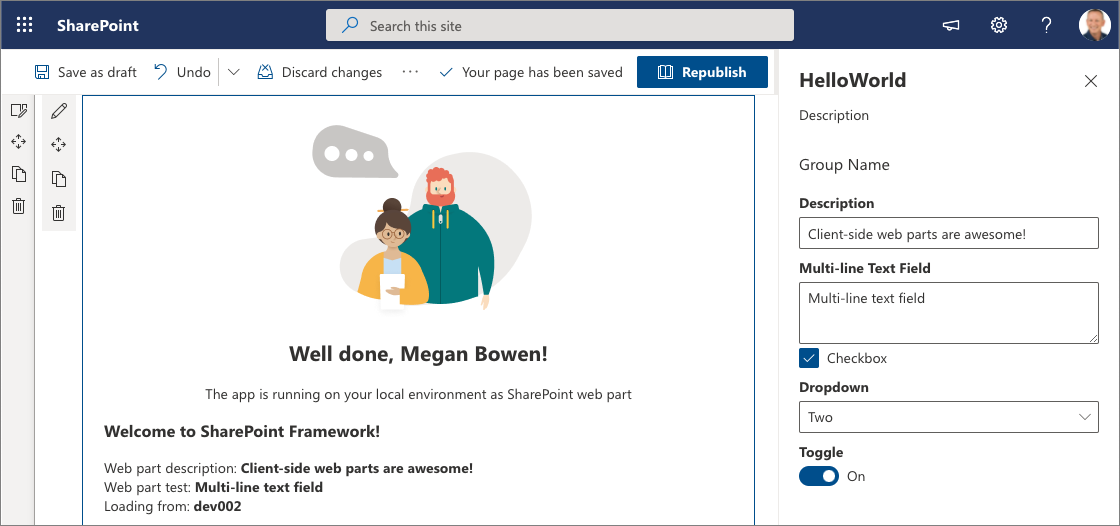
Notice that you still have the same behaviors such as a reactive pane where the web part is updated as you type.
Select the x icon to close the client-side property pane.
On the toolbar, select Save and close to save the page.
1. Build Your Solution: First, make sure your
SPFx solution is properly developed and tested. Use tools like Yeoman, npm, and
gulp to build your project.
2.
Bundle and Package: Run the appropriate
gulp tasks to bundle and package your solution. This step prepares your
solution for deployment. You might use commands like gulp bundle --ship and gulp package-solution --ship.
3.
Upload to App Catalog: Upload the package
file (.sppkg) to the SharePoint app
catalog. The app catalog is a central repository where you can manage and
deploy custom SharePoint apps and solutions.
4.
Add to Site: Once your solution is
in the app catalog, you can add it to the individual sites where you want it to
be active. You can do this via the site contents page or by using the "Add
an app" option on the site.
5.
Grant Permissions (if
necessary): Depending on the functionalities of your SPFx solution, you
might need to grant certain permissions to the app. This is typically done
during the installation process.
6.
Test Your Solution: Thoroughly test your
solution to ensure that it works as expected in the SharePoint environment
where it's deployed.
7.
Monitor and Maintain: After deployment,
monitor the solution to ensure it continues to work correctly, especially after
SharePoint updates or changes. Regular maintenance and updates might be
necessary.

Comments
Post a Comment