SharePoint REST API Azure certificate for authentication
Create public and private Certificate
When using SharePoint Online you can define applications in Azure AD and these applications can be granted permissions to SharePoint, but also to all the other services in Office 365 (note: this will not work for SharePoint On-Premise.)
1- Create an empty text file on your computer.
2- Copy the PowerShell script from the Granting access via Azure AD App-Only page and paste it into the empty text file created.
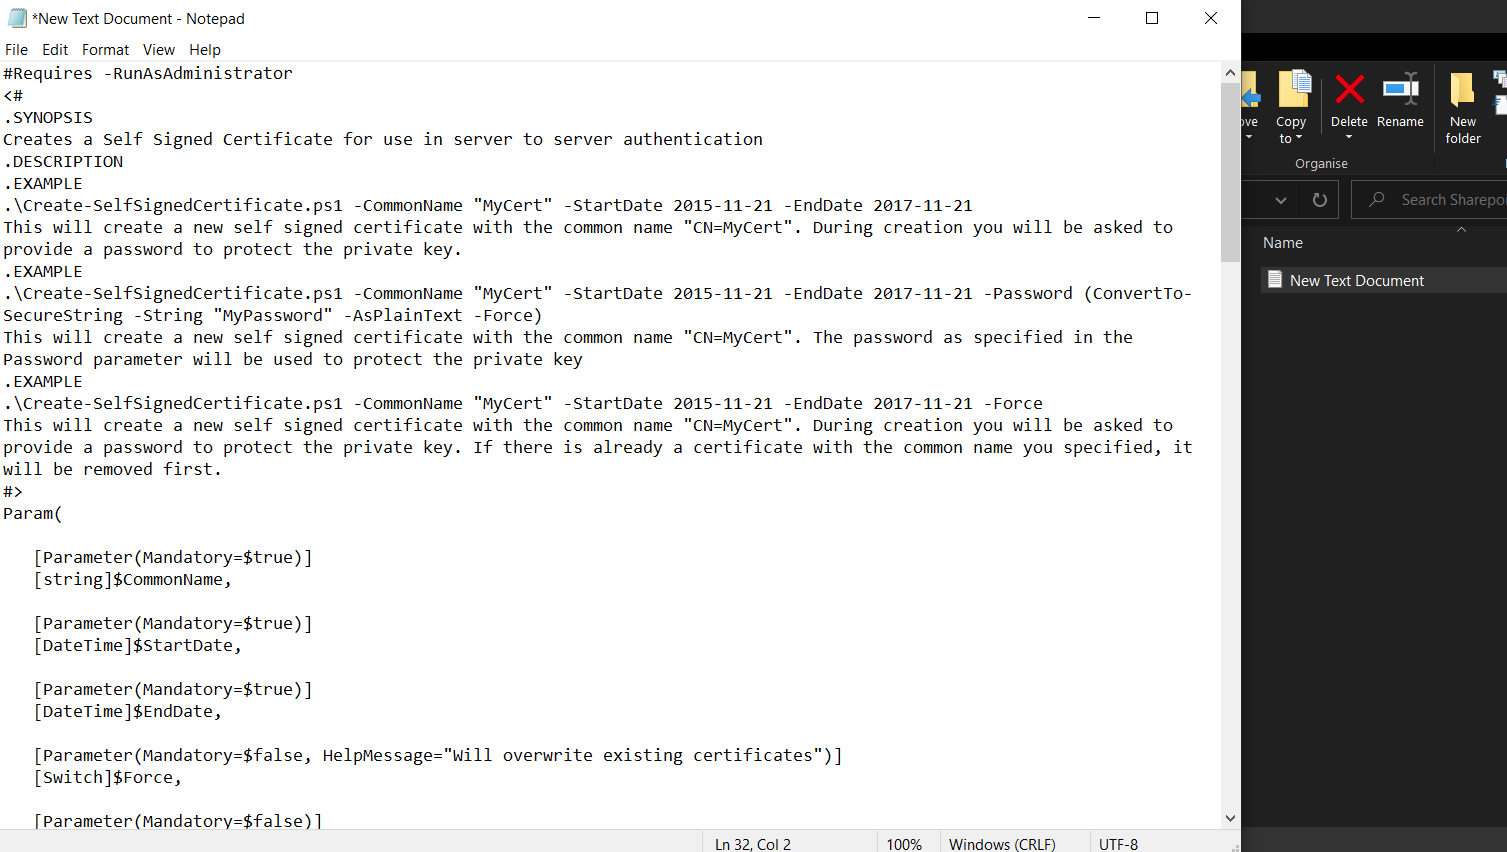
3- Rename the text file Create-SelfSignedCertificate and save it as a ps1 file (Create-SelfSignedCertificate.ps1).
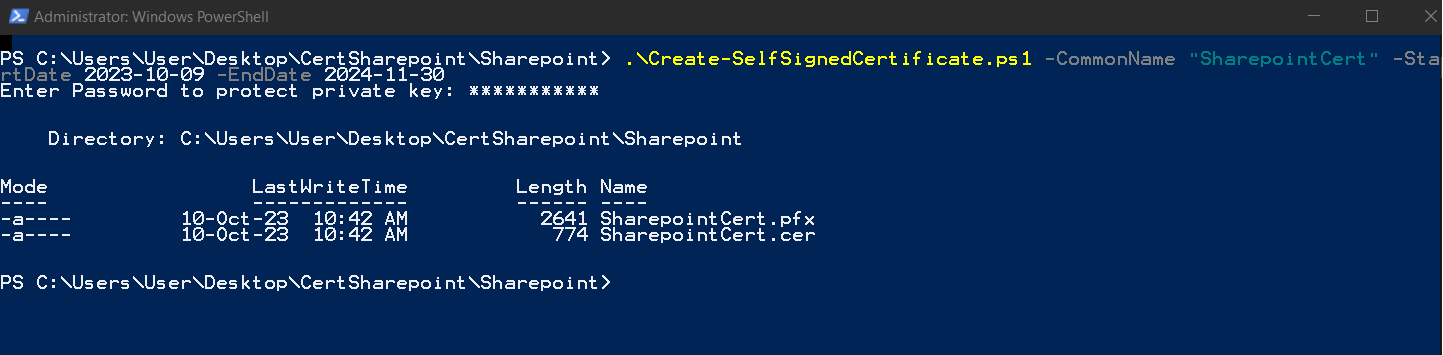
4- Open Windows PowerShell as Administrator inside the folder where this file is saved.
5- Copy the PowerShell command from the above-mentioned page:
.\Create-SelfSignedCertificate.ps1 -CommonName "SharepointCert" -StartDate 2023-10-09 -EndDate 2024-11-30
The CommonName value is the name of the certificate we are creating.
Change the StartDate to the current date and the EndDate to a date of your choice.
6- Paste and run the modified command to Windows PowerShell.

7- Enter the password will prompt to protect the Private Key so set a password as you want to protect this Private key.

2 files will be created: SharepointCert.pfx (private key) and SharepointCert.cer (public key).
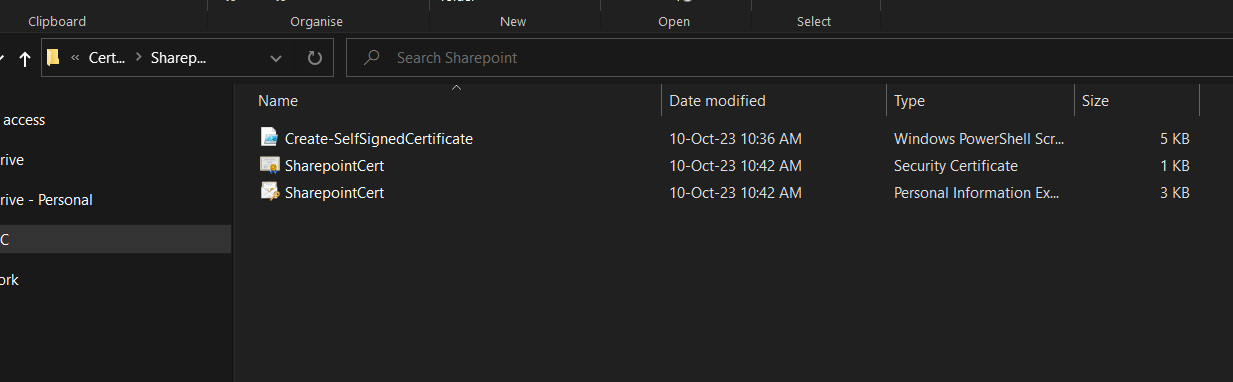
Keep the private key safe. The public key is the one you need to upload to your Azure Application.
SharePoint Rest API & Azure App Registration and Upload Certificate
To consume a REST API using a certificate for authentication, you typically use a client certificate to authenticate your application with an API endpoint. This approach is common in scenarios where OAuth 2.0 with client credentials flow is employed. Below is a guide on how to achieve this using various tools and libraries.
1. Set Up the Certificate
Ensure you have a client certificate (including the private key) and that it is correctly set up. This certificate will be used to authenticate your application with the API.
2. Register and Configure Your Application
Azure AD Setup (for APIs secured by Azure AD)
Register the Application:
- Go to the Azure portal.
- Navigate to Azure Active Directory > App registrations.
- Register a new application.
Upload the Certificate:
- In the application registration, go to Certificates & secrets.
- Upload your
.cerfile (public part of the certificate).
Configure API Permissions:
- Go to API permissions and add the required permissions for the API you want to access.
- Grant admin consent if needed.
3. Use the Certificate to Authenticate and Call the API
Here’s how to use the certificate to authenticate and consume a REST API in different programming environments:
Using C# (.NET Core)
Install NuGet Packages:
- bash
dotnet add package Microsoft.Identity.Client dotnet add package System.Net.Http Sample Code to Authenticate and Call the API:
csharpusing System; using System.Net.Http; using System.Security.Cryptography.X509Certificates; using Microsoft.Identity.Client; class Program { static async System.Threading.Tasks.Task Main(string[] args) { // Configuration string tenantId = "your-tenant-id"; string clientId = "your-client-id"; string authority = $"https://login.microsoftonline.com/{tenantId}"; string apiUrl = "https://yourapi.com/endpoint"; // Load the certificate var certPath = @"C:\path\to\yourcert.pfx"; var certPassword = "your-cert-password"; var cert = new X509Certificate2(certPath, certPassword); // Create a confidential client application var app = ConfidentialClientApplicationBuilder.Create(clientId) .WithAuthority(new Uri(authority)) .WithCertificate(cert) .Build(); // Get a token var result = await app.AcquireTokenForClient(new[] { "https://yourapi.com/.default" }).ExecuteAsync(); // Call the API using (var client = new HttpClient()) { client.DefaultRequestHeaders.Authorization = new System.Net.Http.Headers.AuthenticationHeaderValue("Bearer", result.AccessToken); var response = await client.GetAsync(apiUrl); var content = await response.Content.ReadAsStringAsync(); Console.WriteLine(content); } } }

Comments
Post a Comment